How to Draw a Semicircle in Anime Studio
Canvas animations: Simple Circle Progress View on Android
![]()
The Android Class class lets us draw anything* that we can imagine using basic shapes, paths, and bitmaps. The Canvas API it's really big 🤯 and daunting at first sight. Here we're only going to scratch the surface to create our simple animation.
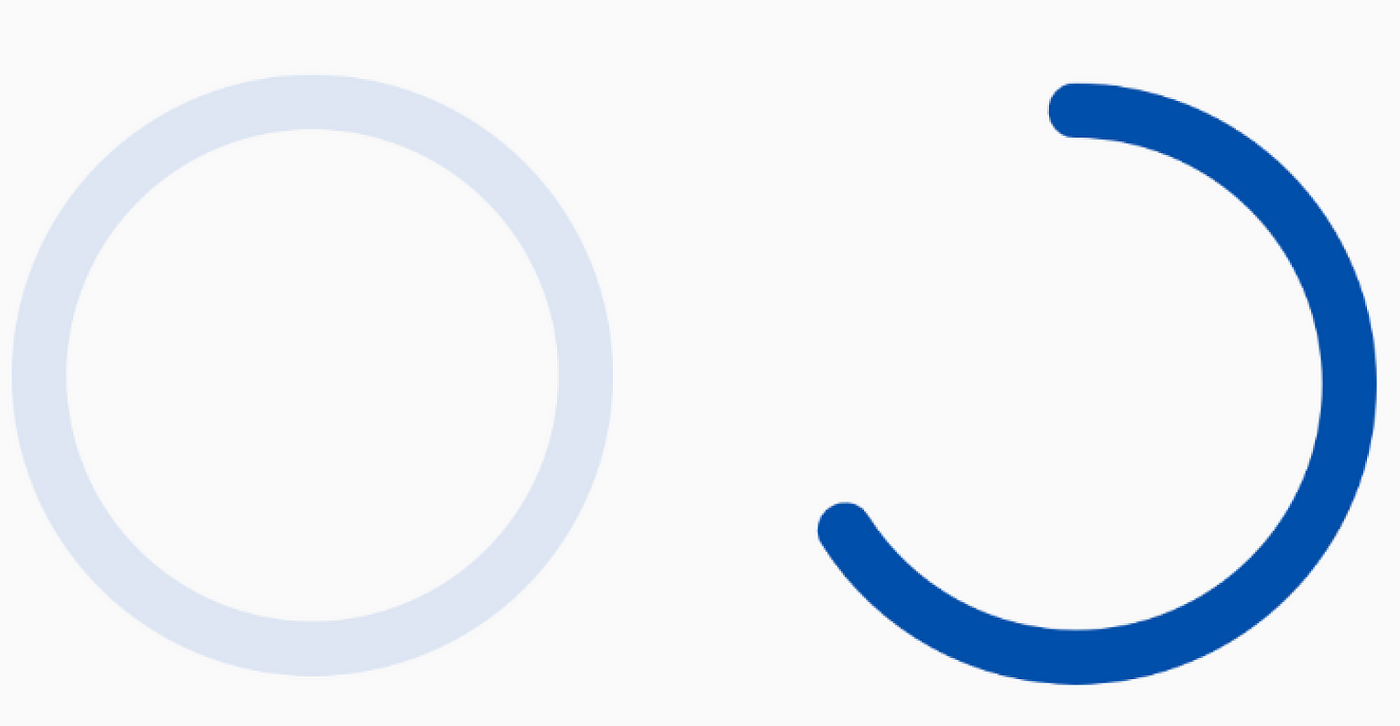
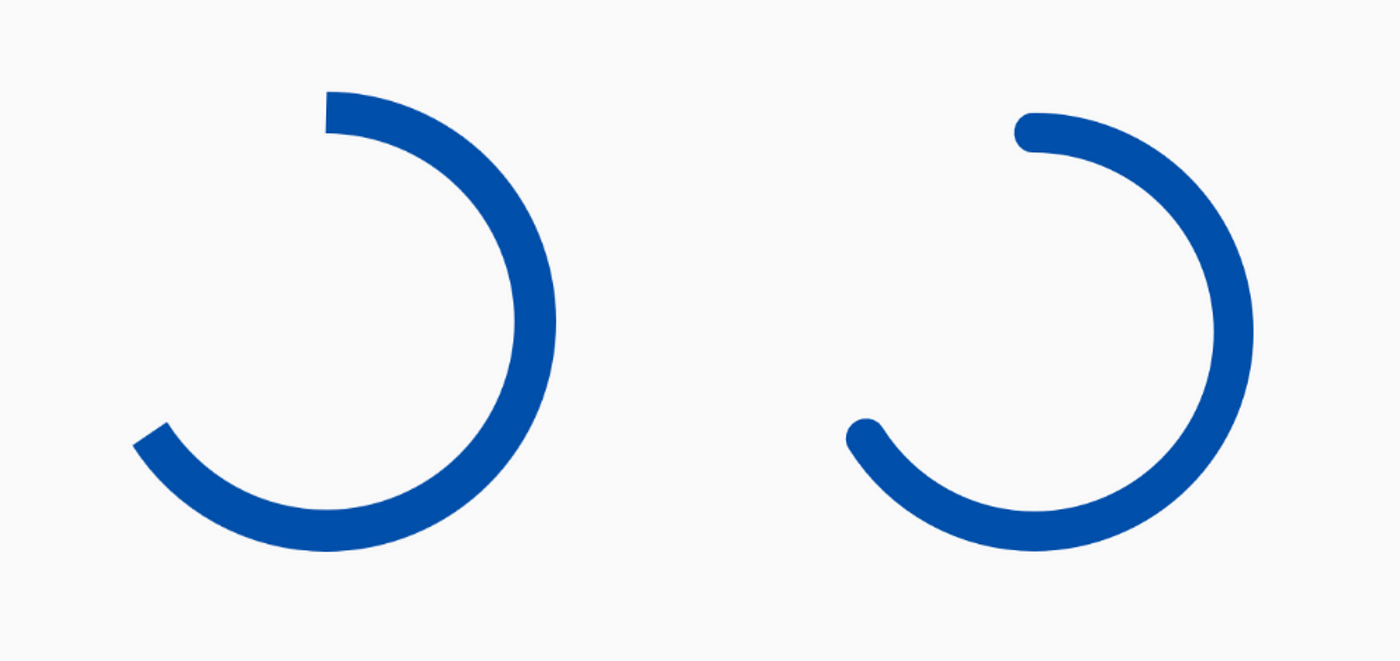
The animation
Note
This article will be covering each step for conceiving the animation but I do recommend reading a bit further: Getting started with drawing on the Android Canvas by Rebecca Franks it's a great read 🤓.
Ok, lets started!
You may know the drill . Create a new project, with an empty activity, and create a class that extends from the AndroidView class:
          class CircularProgressView(
            context: Context?,
            attrs: AttributeSet?
) : View(context, attrs) {}
And now we have our ready to draw on view! 🙌
What do we need to draw?
In order to achieve this animation we first have to know how to draw the circles, we need one to be the background and another arc to fill the current progress.
And how can we draw it?
Each view comes with a onDraw method override which provides us with a Canvas instance for us to start drawing with. To achieve our animation we need to create draw two arcs using the canvas instance, one arc for the background, and one of the tops, which will be the one to be animated. For that, we'll need to use the Canvas#drawArcmethod, which can let us draw a circle with nothing on the inside.
Let's take a look into it 🖌.
          public void drawArc (
            RectF            oval,
            float startAngle,
            float sweepAngle,
            boolean useCenter,
            Paint            paint
)
Nice, but what do they mean?
- The
RectF ovalis just a holder for the coordinates needed to create an "invisible rectangle" in which our oval will be contained. This oval is used to define the shape and size of the arc. -
startAngle: is the degree starting point from our oval from where we are going to start drawing the arc. -
sweepAngle: means how much of the arc is going to be painted from thestartAngleto this angle. -
useCenter: the documentation explains it as, if true, include the center of the oval in the arc, and close it if it is being stroked. This will draw a wedge. -
paint: this is the object that provides the information to the drawing of how it should be stroked, it's color, and more.
Drawing the background circle 🎨
Now that we understand what we need in order to draw an arc, let's get to the code.
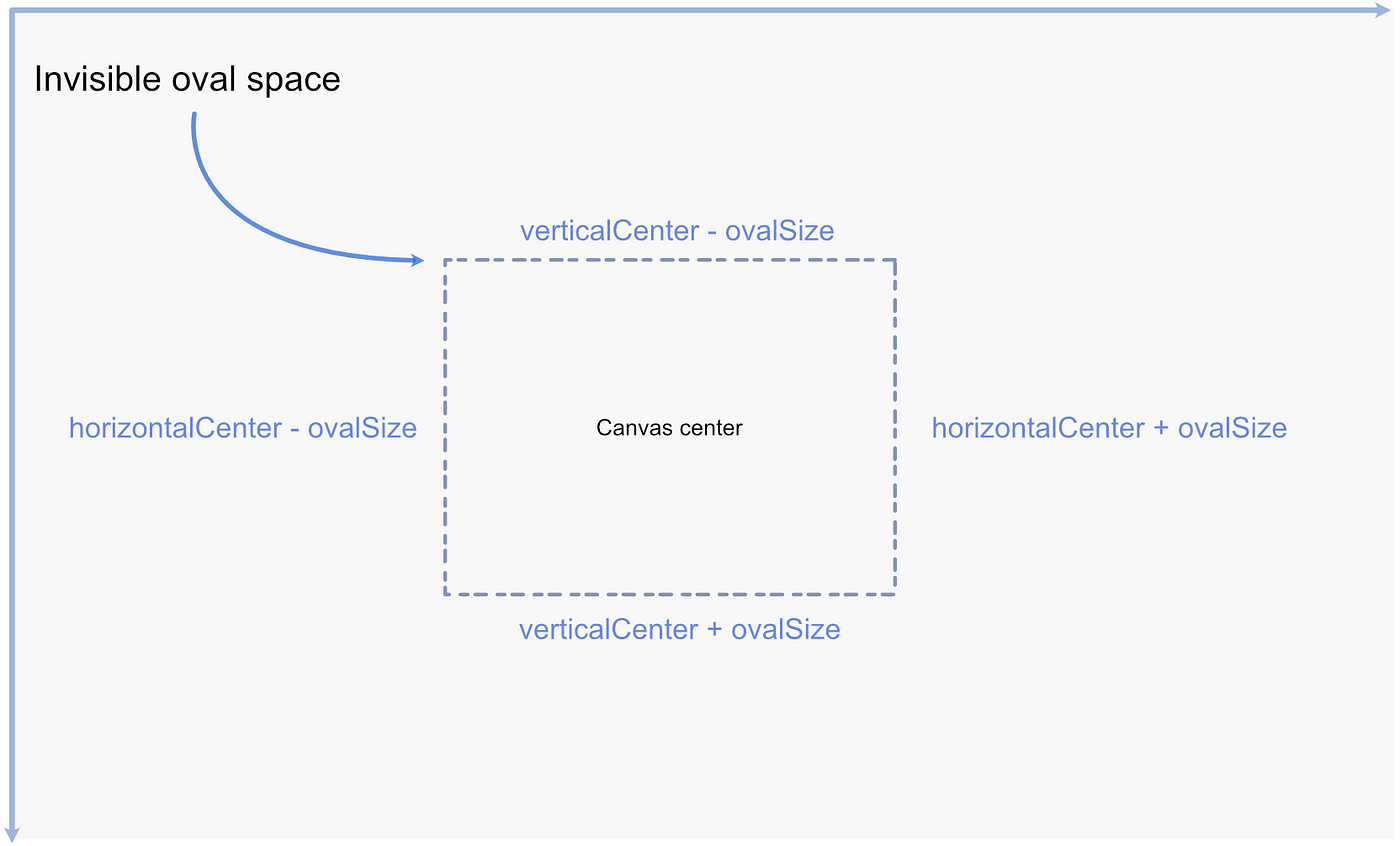
In our view's onDraw method we should create our oval's RectF space with the correct dimensions we want our circle progress to have:
          // ...          private val ovalSpace = RectF()                    override fun onDraw(canvas: Canvas?) {
            setSpace()
                        }private fun setSpace() {
            val horizontalCenter =            (width.div(2)).toFloat()
            val verticalCenter =            (height.div(2)).toFloat()
            val ovalSize = 200
            ovalSpace.set(
            horizontalCenter - ovalSize,
            verticalCenter - ovalSize,
            horizontalCenter + ovalSize,
            verticalCenter + ovalSize
            )
}
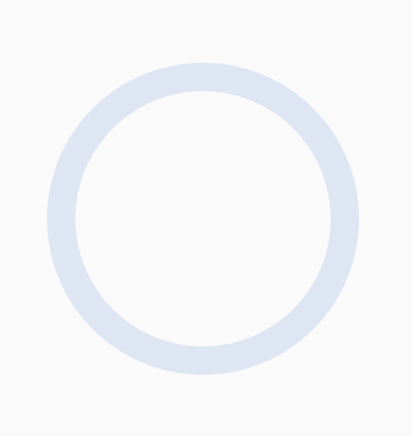
As this won't be painted it would only represent an invisible oval space like the following:
After we have our oval space we can use the canvas object to draw our arc on it. But in order to visualize it, we need a paint object to pass the to the drawArc canvas method. Let's create it:
// ... private val parentArcColor = context?.resources?.getColor(R.color.gray_light, null) ?: Color.GRAYprivate val parentArcPaint = Paint().apply {
// ...
style = Paint.Style.STROKE
isAntiAlias = true
color = parentArcColor
strokeWidth = 40f
}
The paint object arguments are self-explanatory, but a good thing to note is to:
Use the
isAntiAliasflag to ensure your drawing has smooth edges.
And let it be a circle 🎨
          // ...          override fun onDraw(canvas: Canvas?) {
            setSpace()
            canvas?.let                        {
            it.drawArc(ovalSpace, 0f, 360f, false, parentArcPaint)
                        }
                        }
In order to see anything, we need to make sure our custom view is added to the main activity layout. The name of the custom widget will be the name of our class in this case CirculaProgressView.
                      <com.labs.circularprogress.CircularProgressView
            android:id="@+id/progress"
            android:layout_width="match_parent"
            android:layout_height="200dp"
            app:layout_constraintBottom_toBottomOf="parent"
            app:layout_constraintStart_toStartOf="parent"
            app:layout_constraintEnd_toEndOf="parent"
            app:layout_constraintTop_toTopOf="parent"            />
And we will be able to see:
Drawing the inner circle 🎨
Now that we already know how to draw an arc, this part would be easy, just declare a paint object for it and draw it on our onDraw method. There would be a few differences, but I'll be explaining each of the ones. Let's see:
          // ...
private val fillArcPaint = Paint().apply                        {
                        style            = Paint.Style.STROKE
            isAntiAlias            = true
            color            = fillArcColor
            strokeWidth            = 40f                      // 1
            strokeCap            = Paint.Cap.ROUND
            }                    override fun onDraw(canvas: Canvas?) {
            setSpace()
            canvas?.let                        {                                              // 2
                                    drawBackgroundArc(            it            )                                              // 3
            drawInnerArc(            it            )
                        }
                        }                    private fun drawBackgroundArc(it: Canvas) {
            it.drawArc(ovalSpace, 0f, 360f, false, parentArcPaint)
}private fun drawInnerArc(canvas: Canvas) {
              // 4
            val percentageToFill = 180f                                    // 5
            canvas.drawArc(ovalSpace, 270f, percentageToFill, false, fillArcPaint)
}
Taking a look at the differences 🧐
-
strokeCap = Paint.Cap.ROUNDthis would make the edge of the stroke while drawing to look round instead of flat.
2. We moved the logic to draw the background arc into it's own functions to improve readability at the onDraw method.
3. Created another function that will take care of drawing the inner arc.
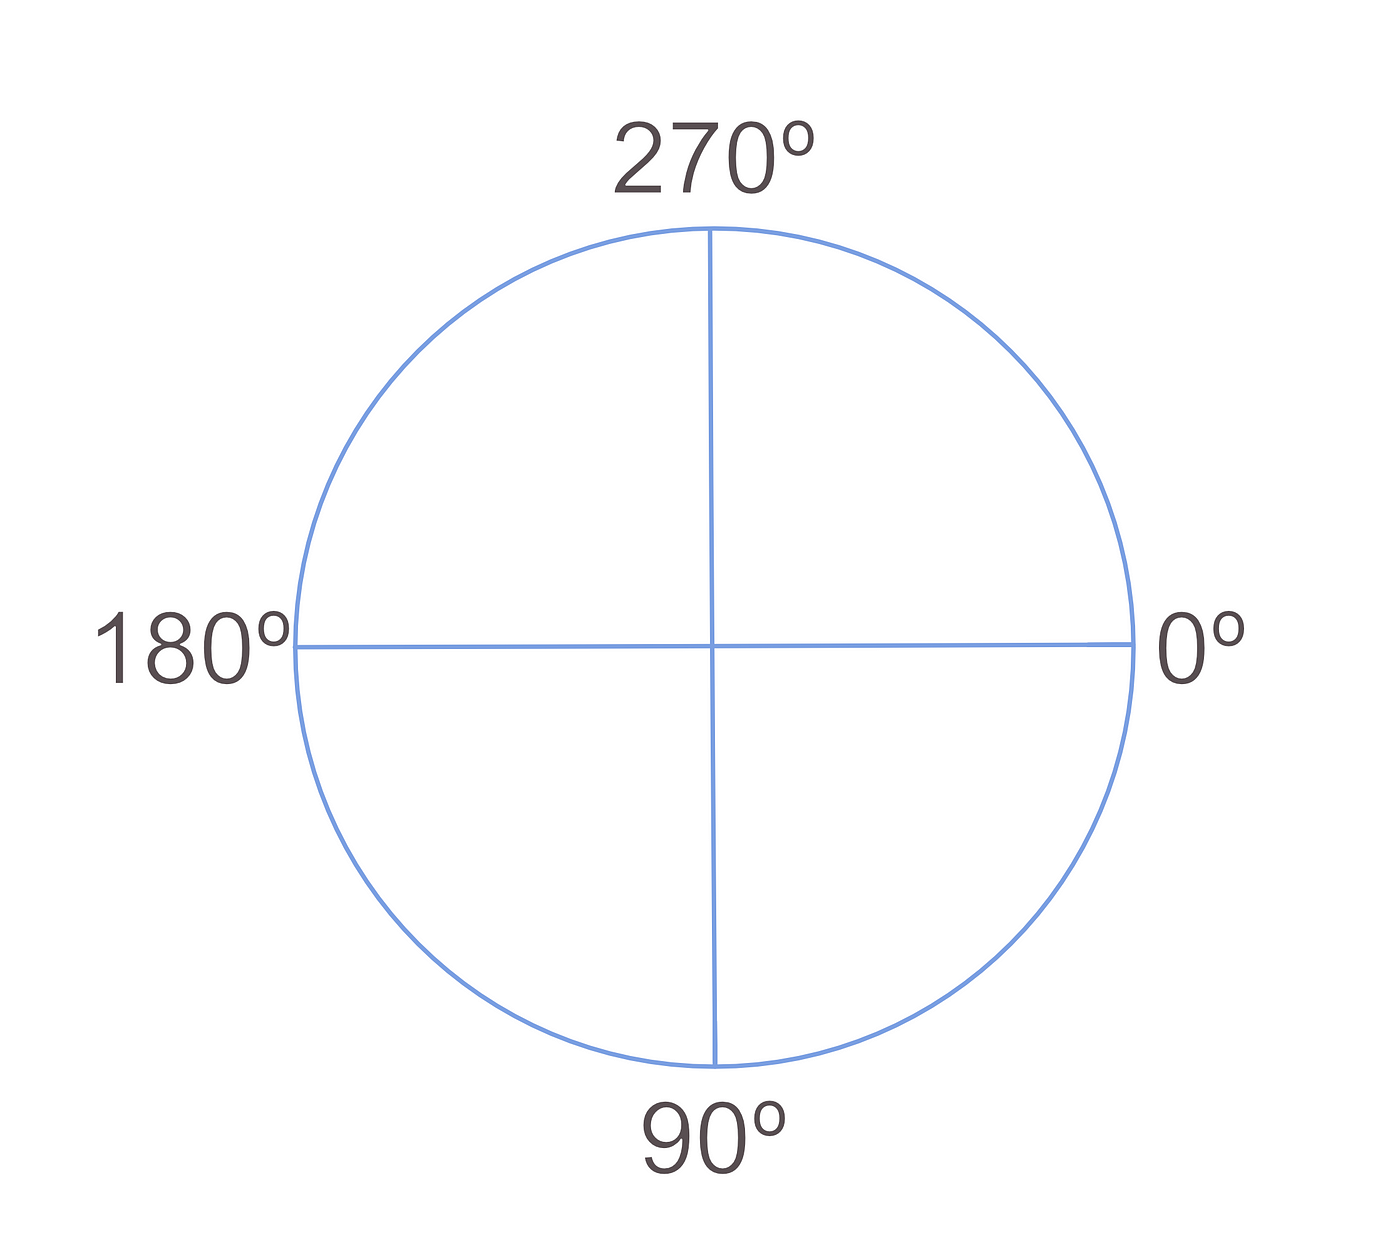
4. We set the canvas#drawArc sweepAngle parameter to 180f as right now we only want to draw half of the circle.
5. Here we can notice a 270f value for our startAngle parameter, this is because the angle diagram does not start as we use to. The 270f value will set the startAngle at the top as you could see in the next image.
Let's start with animations 🚀
Let's do a tiny recap. In order to be able to draw something, we need to specify everything that we want to show at our view onDraw function. Easy peasy right? Now… if we want to display something new in our canvas we need to draw everything we had before and then draw the new thing we want it to appear, in our case this new thing would be an incrementing arc to show the progress.
To achieve this we need a few things:
- A value that indicates the percent of our arc to draw and that we can change dynamically that can be read from our
onDrawfunction - Draw the new value
- And call a redraw for our view
- And repeat
First, let's change our drawInnerArc function to use a dynamic currentPercentage value to determine the percentage fill to be drawn:
          private var currentPercentage = 0          //...          private fun drawInnerArc(canvas: Canvas) {
            val percentageToFill = getCurrentPercentageToFill()
            canvas.drawArc(ovalSpace, 270f, percentageToFill, false, fillArcPaint)
}private fun getCurrentPercentageToFill()            =
            (ARC_FULL_ROTATION_DEGREE *            (currentPercentage / PERCENTAGE_DIVIDER)).toFloat()
To draw the new value, we have to ask the view for a redraw and this is done b calling the view invalidate() method when a redraw is needed.
Now we'll create a function to be called when we want to perform the animation. Here we use Android's ValueAnimatorclass to helps us change the the currentPercentage value through time and call our viewinvalidate() on each change, so it can be visualized.
The documentation defines the
ValueAnimatorclass a a simple timing engine for running animations which calculate animated values and set them on target objects.
In our case, we want to animate from values 0% to 100%, and this class will make achieve this animation a piece of cake. So let's take a look into the code, a, I'll explain each step on the go:
fun animateProgress() {
// 1
val valuesHolder = PropertyValuesHolder.ofFloat(
PERCENTAGE_VALUE_HOLDER,
0f,
100f
)
// 2
val animator = ValueAnimator().apply {
setValues(valuesHolder)
duration = 1000
interpolator = AccelerateDecelerateInterpolator()
// 3
addUpdateListener { // 4
val percentage = it.getAnimatedValue(PERCENTAGE_VALUE_HOLDER) as Float// 5
// 7
currentPercentage = percentage.toInt()// 6
invalidate()
}
}
animator.start()
} companion object {
// ...
const val PERCENTAGE_VALUE_HOLDER = "percentage"
}
- We create a
PropertyValuesHolderinstance for holding the values that we want to animate. In this case, we will animate from 0 to 100 percent. In order to create this instance we also need to pass apropertyNamethat we will use later to grab the current animated value from the animator. - Here we create an instance of
ValueAnimator, we set the property values declared before and also pass how much time in milliseconds we want the animation to last. - This will be called on every frame of the animation, providing us with the calculated percentage value for a specific frame. This value will be used to update the
currentPercentageanimation later. - We get the current animation value
(animatedValue)from ourupdateListenerusing thepropertyNamedeclared earlier. - Update the
currentPercentagevariable that is used to draw our inner arc on eachonDrawcall. - Now we call for a view redraw after we already updated the value.
- We run our animation.
Note: This animation will start only when the function
animateProgressget called.
In order to trigger our new animation, we'll need to add a Button to our activity layout in order to perform start it when clicking the button.
                      // ...                                                          <Button
            android:id="@+id/animateButton"
            android:layout_width="wrap_content"
            android:layout_height="wrap_content"
            android:text="animate"
            app:layout_constraintEnd_toEndOf="parent"
            app:layout_constraintStart_toStartOf="parent"
            app:layout_constraintTop_toBottomOf="@+id/progress"            />                                // ...
And add a clickListener on our Activity class:
          animateButton.setOnClickListener            {
            progress.animateProgress()
                        }
And there you go!
You can find the full code here.
How to Draw a Semicircle in Anime Studio
Source: https://medium.com/@paulnunezm/canvas-animations-simple-circle-progress-view-on-android-8309900ab8ed
0 Response to "How to Draw a Semicircle in Anime Studio"
Post a Comment